Testing Times

Anna

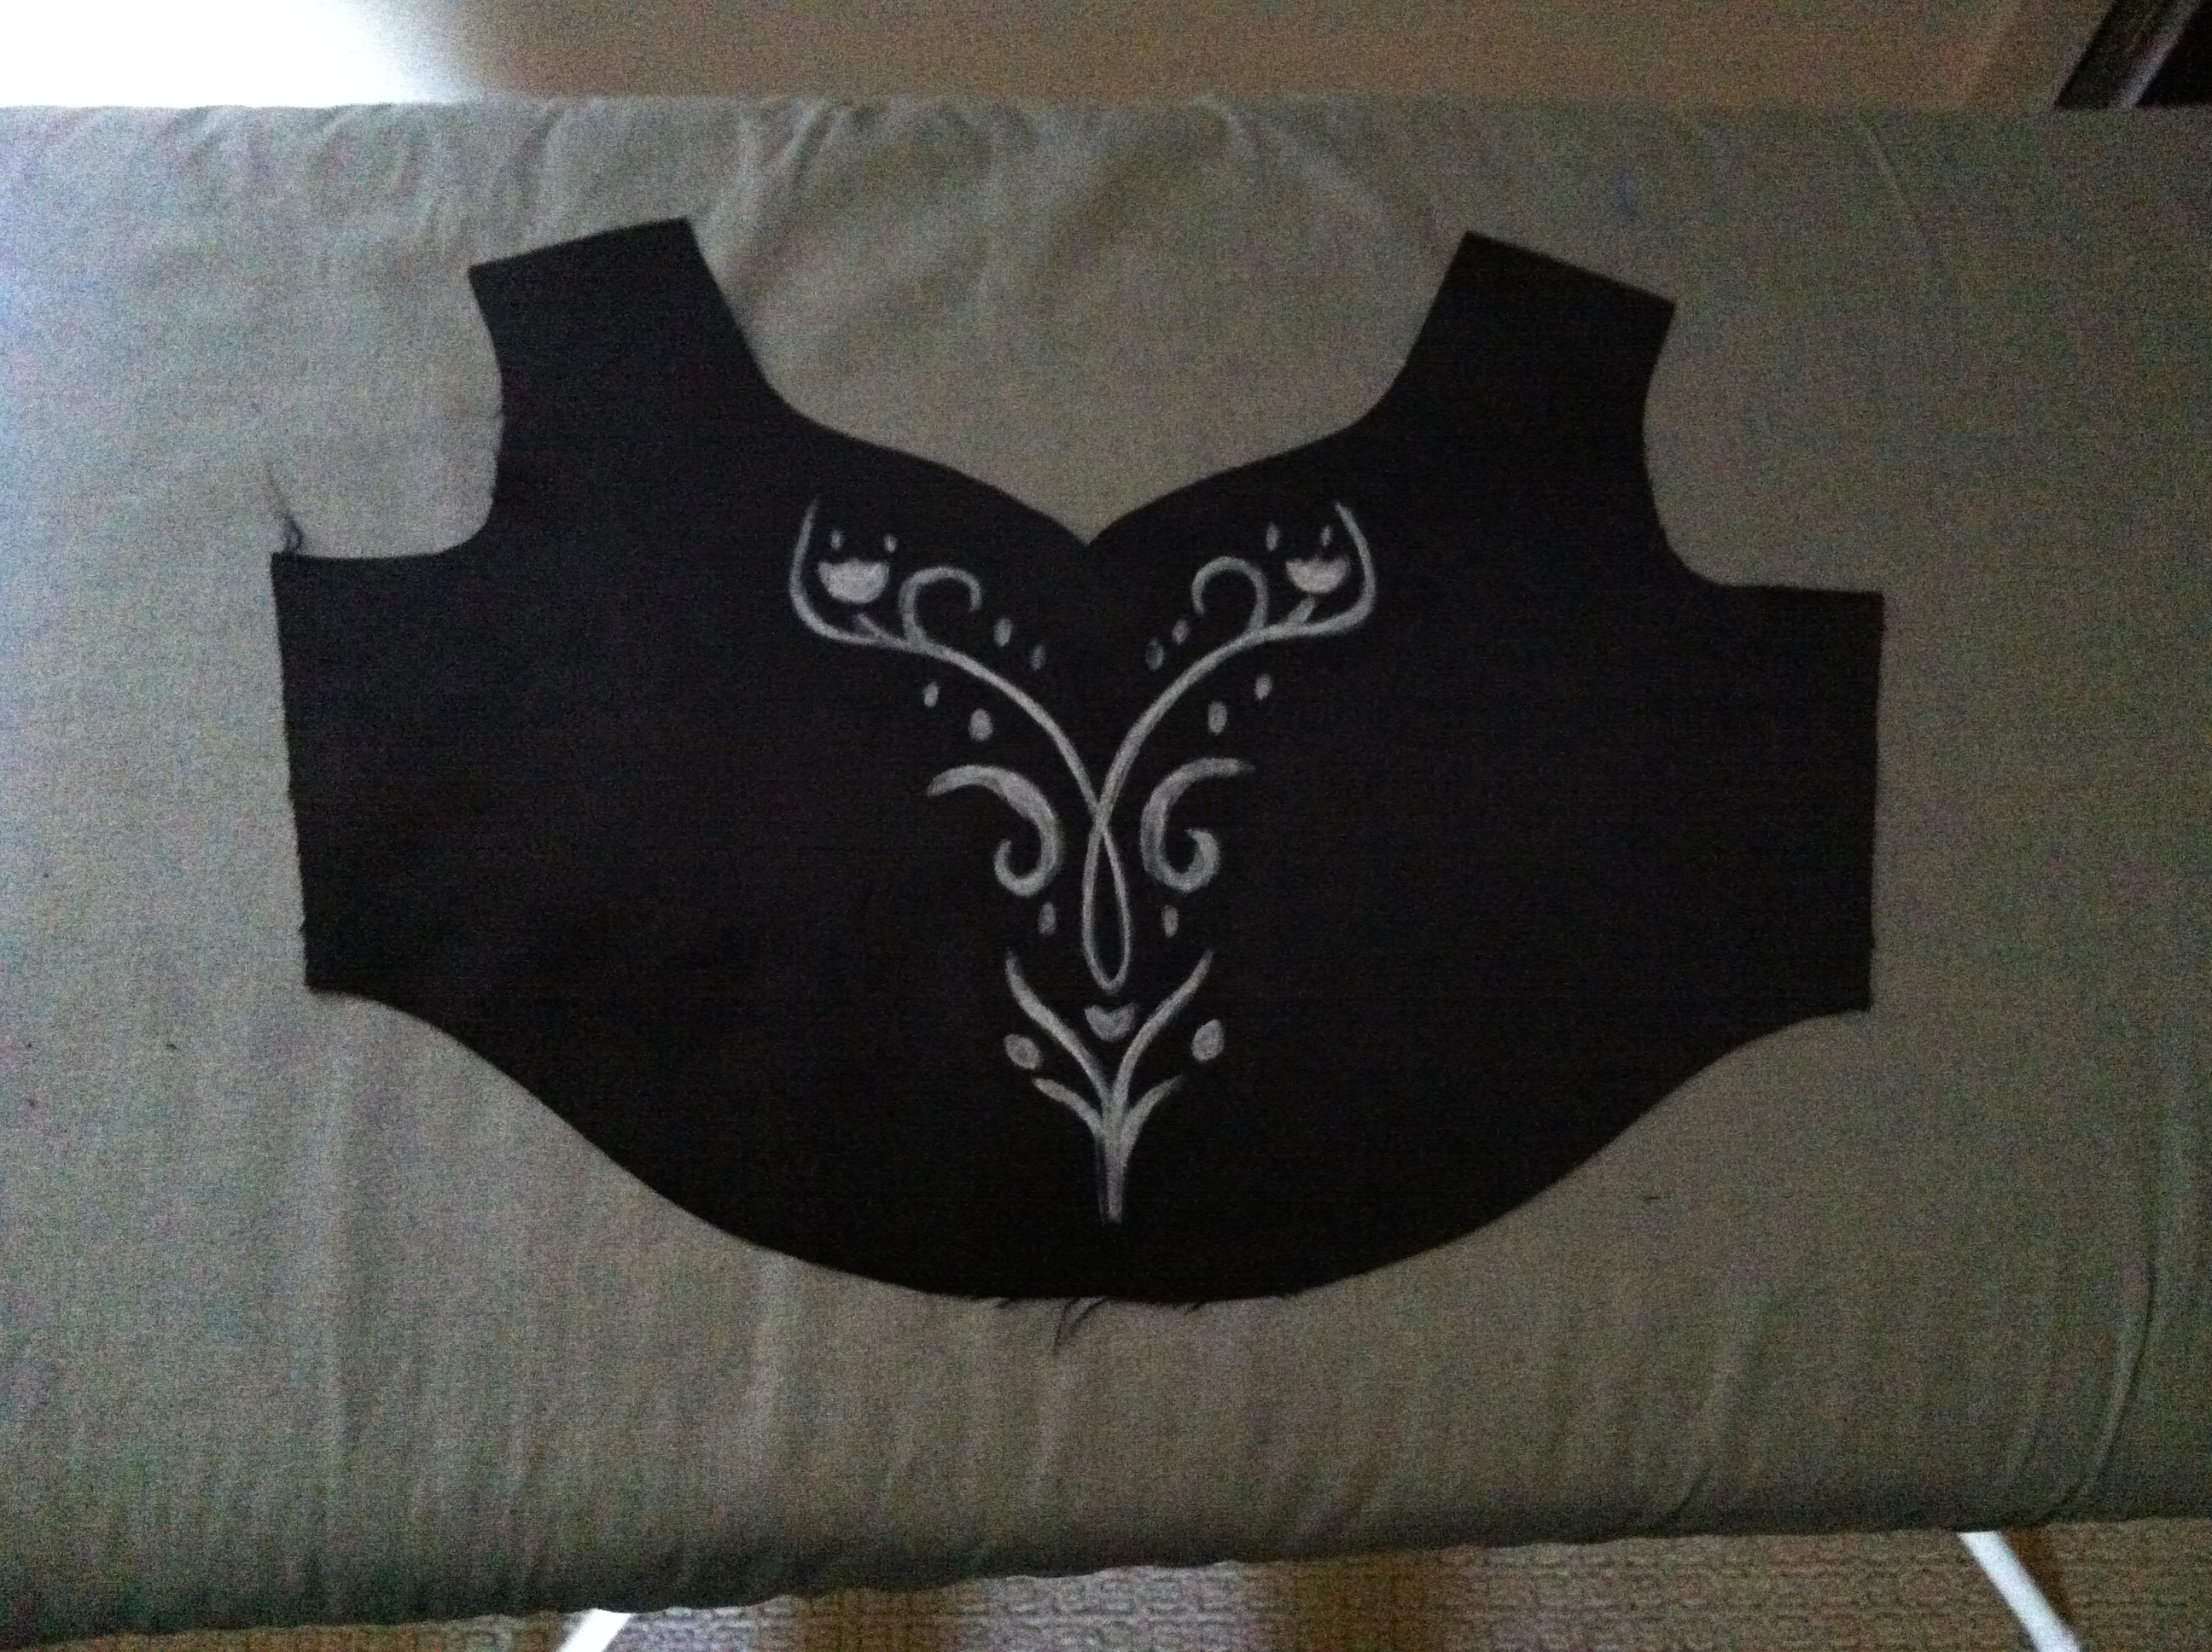
Now that I’ve developed my Princess Anna cape, I need to work on the dress that goes under it. Anna’s dress has some fancy stuff going on though, so I’ve been forced to do some product testing to avoid attempting fancy stitching. Not sure if you can see the design clearly in the picture above, but, doing a little photoshop work, it looks a little like this:

anna

After a little research, I decided that I wanted to do something with paint. The catch there, of course, is that the bodice of Anna’s dress is black. There is no end of difficulty finding a simple, affordable paint that will show on black fabric. And then I stumbled across Derivan FabricArt Markers. They seemed to meet all of the requirements. Easy to use, not hugely expensive, and, in the kicker, available in a white that seems to allow colours to show on black. The video on the website shows them producing some fairly crisp images on black fabric. I got excited and ordered a few. I got even more excited today when I heard the postman quite literally throw them at my front door. (Side note: How hard would it have been for him to take the extra 12 steps and put them at the front door, instead of standing at the bottom step and throwing? Thank god they were well wrapped within the package, or I think I might now be reviewing shards of marker.)

In my excitement, I didn’t wait to test them. I had a bodice cut out from an earlier failed experiment, and decided that it would do for testing. I carefully stencilled on my design – which was the purpose of the Photoshop exercise, creating a working stencil – and waited for the white paint to reveal itself. I have to admit, I probably had unrealistic expectations. It’s a bad habit I’m trying to break. But I was not wholly disappointed with the first attempt. After all, I’d been aware that I might have to do multiple applications. So, rather than throwing the pens away in disgust when I didn’t get a clear image after the first application, I patiently did another round, and then a third. Before heat setting the third application, I was excited again. It looked great.

IMG_1226And then I ironed it. I followed directions. I’d waited for it to dry. I used the right heat setting, on the reverse of the fabric. I moved the iron evenly over the design, and hopefully turned it back right side up. And this is what I saw.

IMG_1228

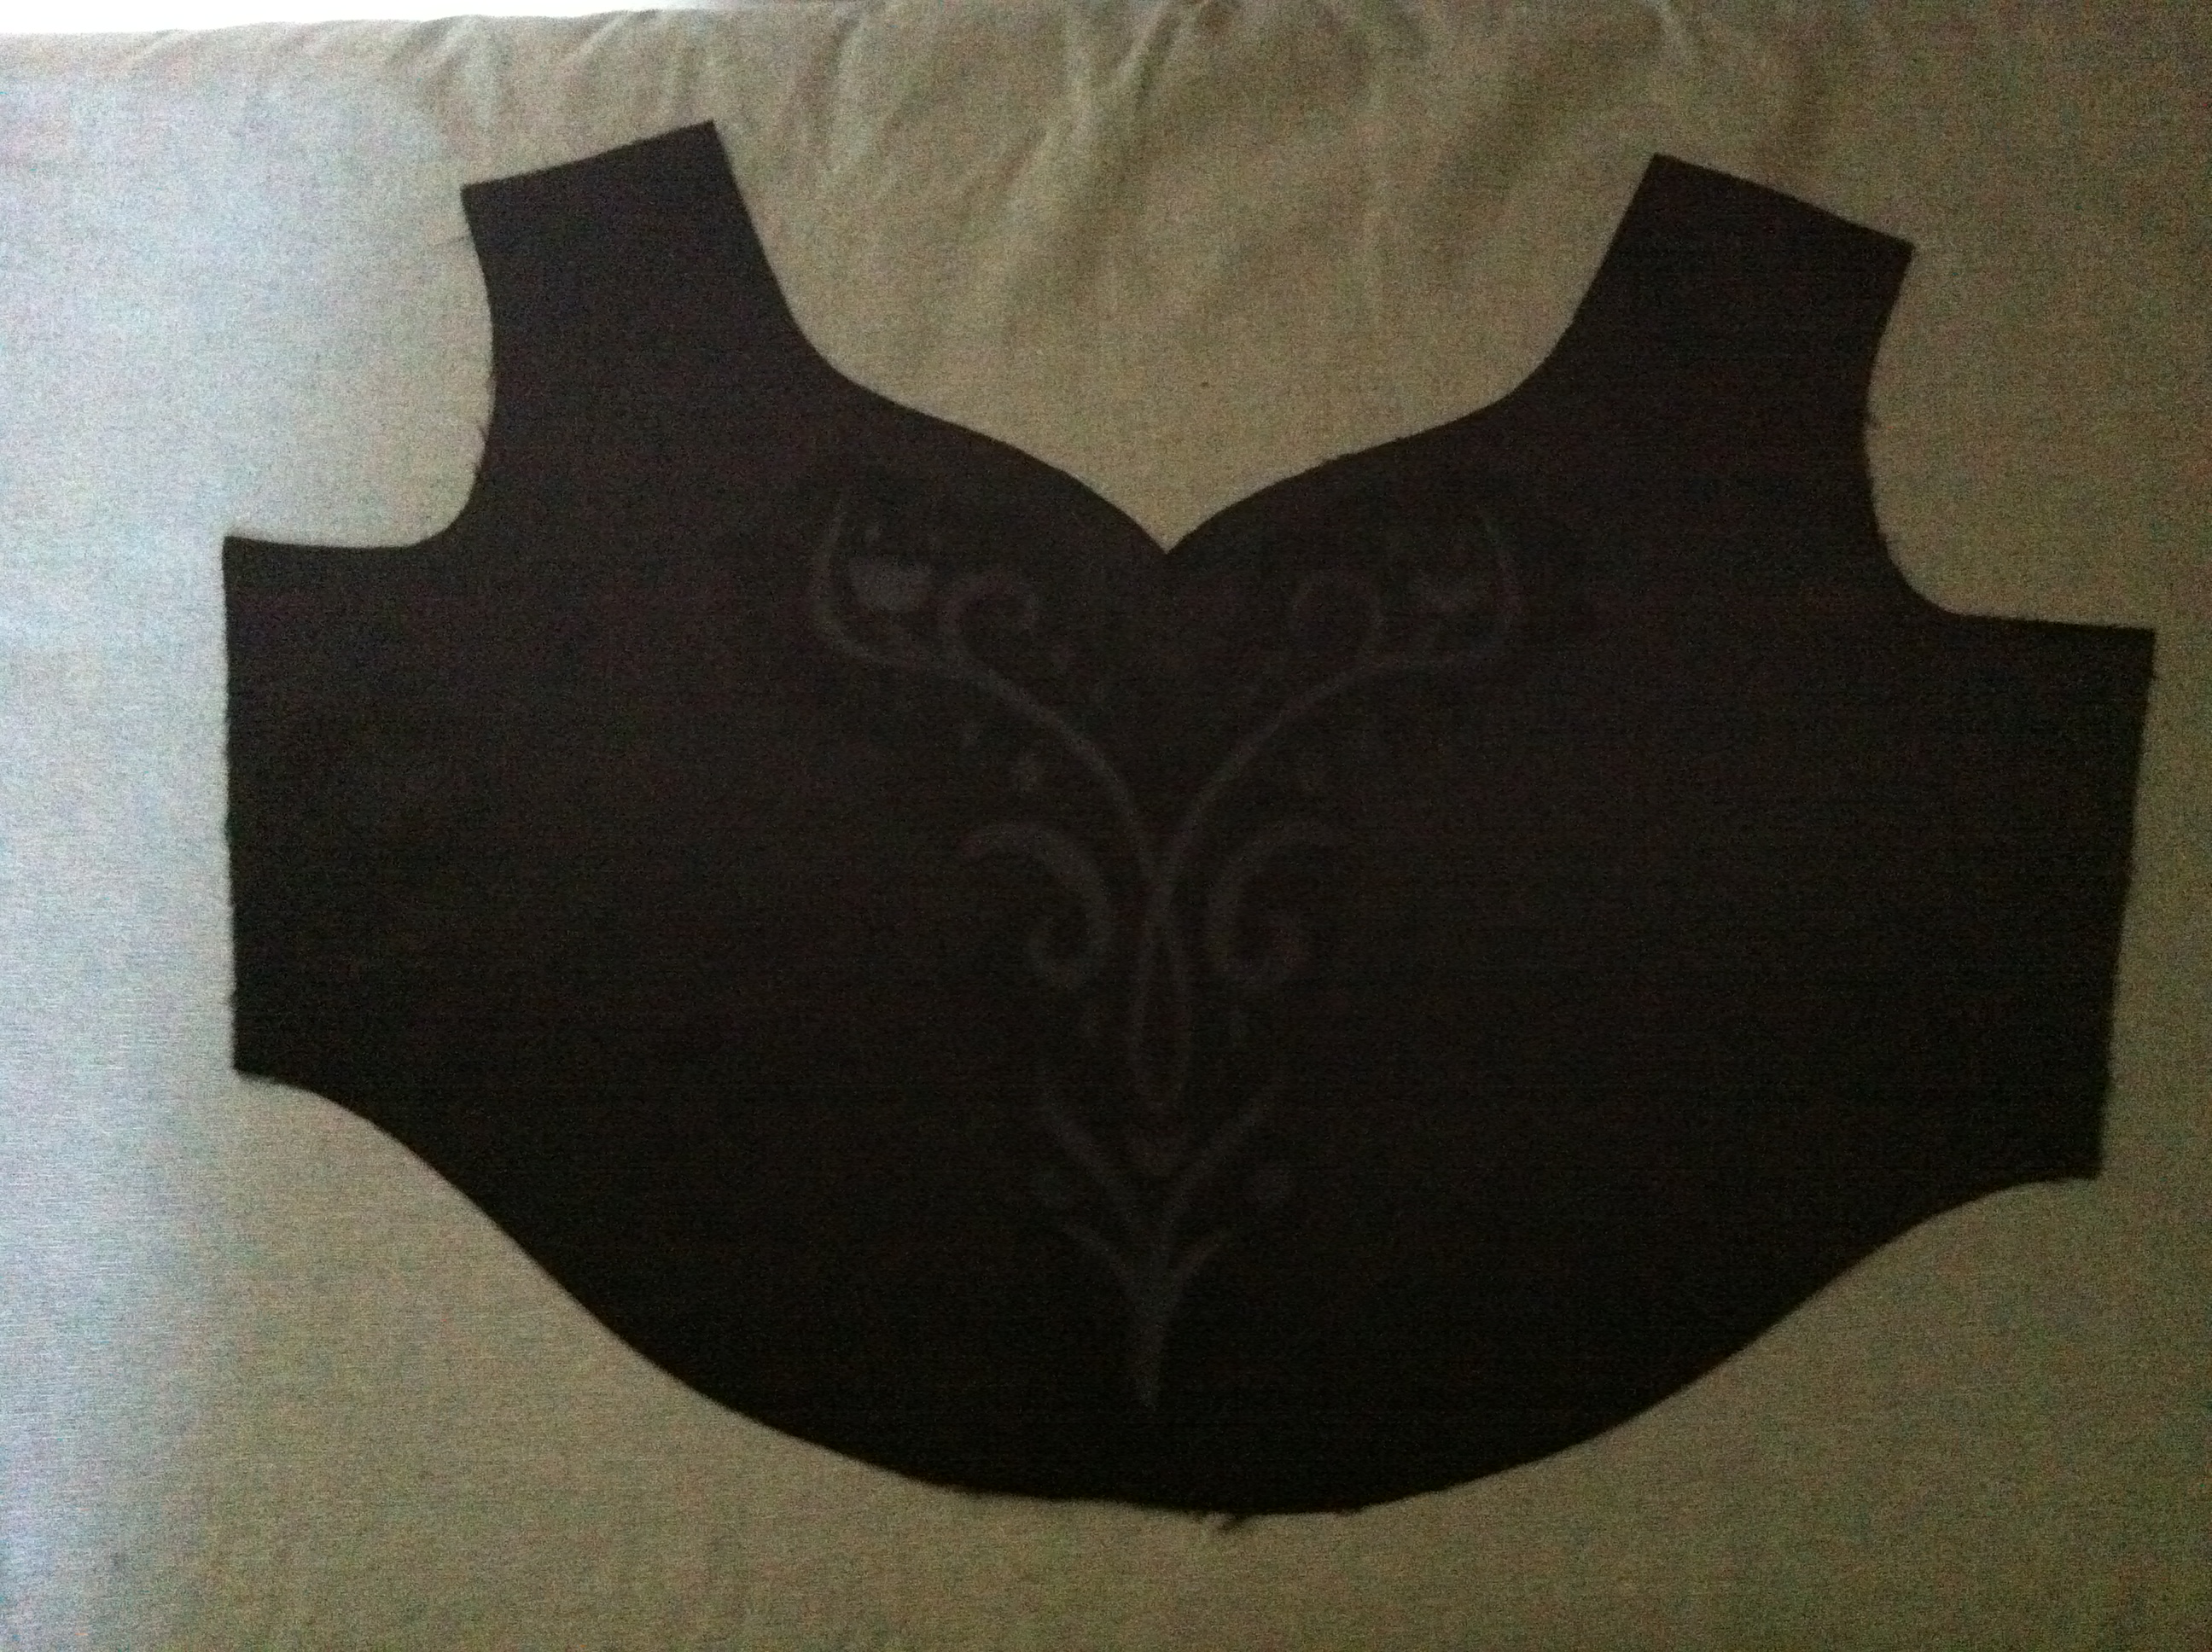
Yeah. It was gone. It looks a little like the design had been flocked. But not really. Looking closer, it was embossed onto the satin of the bodice. It was visible in the right light, and kind of cool, but not at all what I wanted. Not entirely daunted, I moved on and thought that perhaps another application of white, followed by some colour may have the desired effect. I bet you’re waiting on the edge of your seat to know how this turns out, yes? So I’ll cut to the chase. Another white, and two layers of colour, and this is where I stand:

DSCN6677

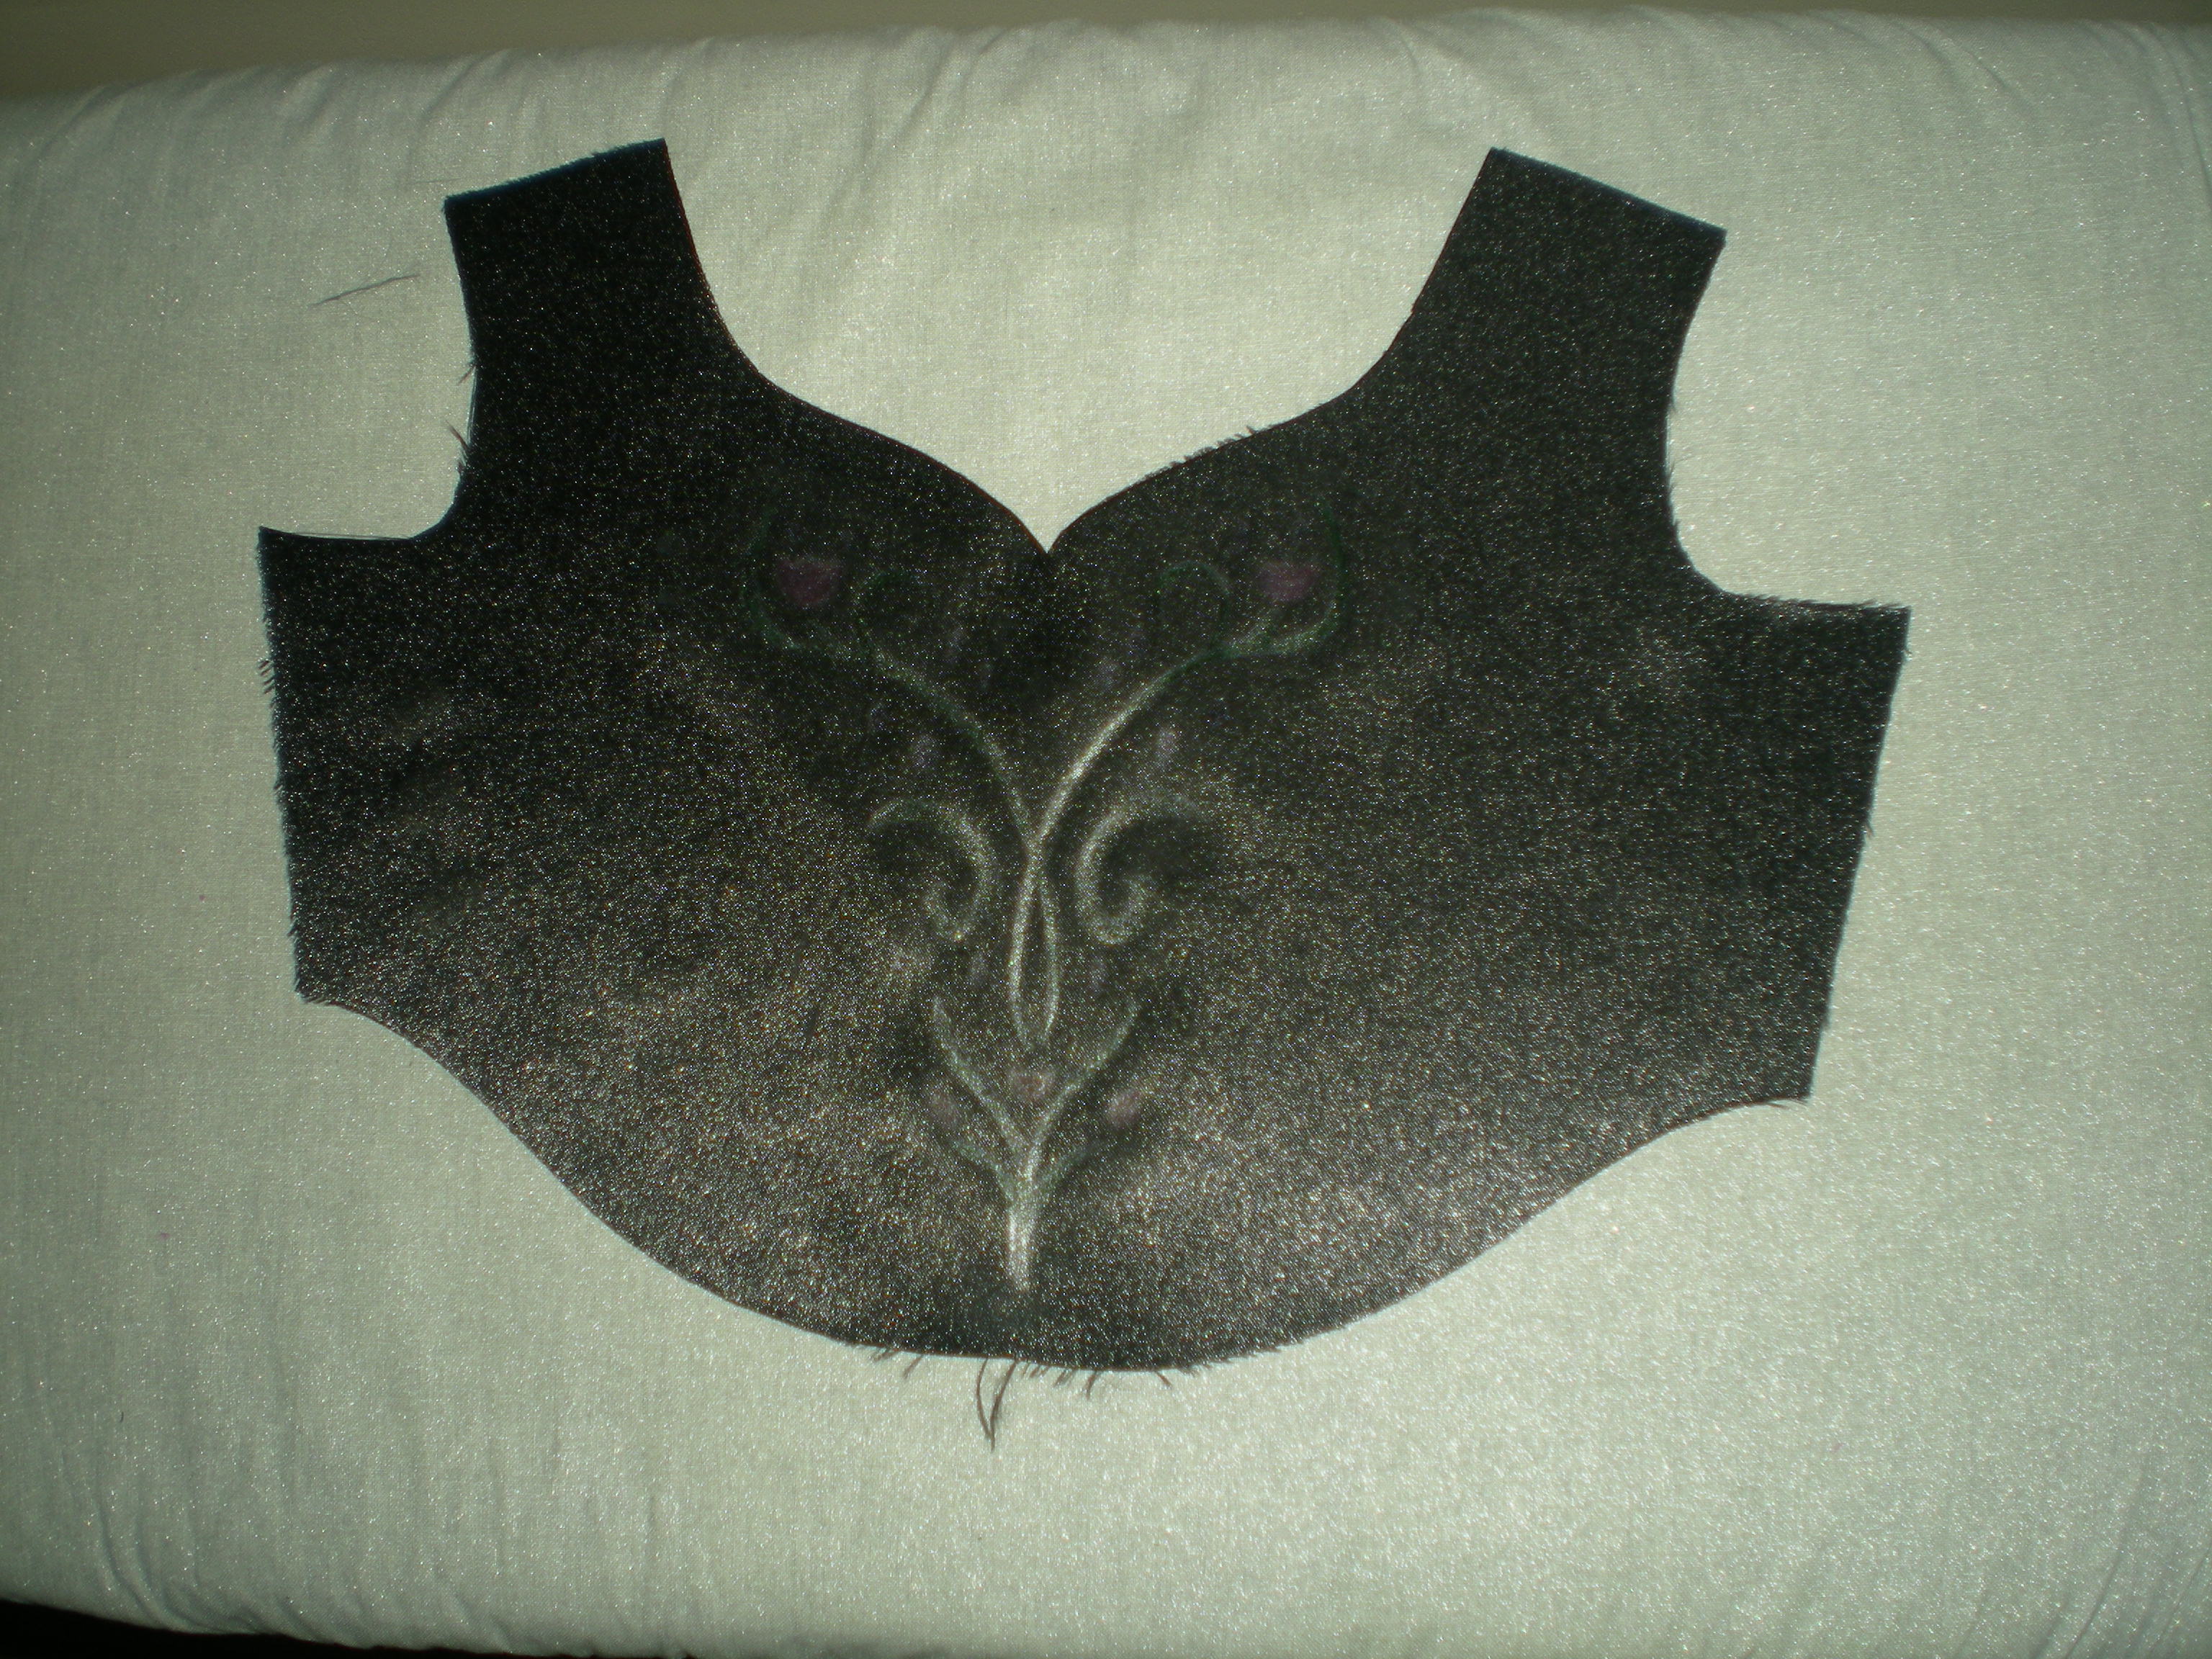
Look closely, and you can just make out some colour there. Some. Again, I show that my skills with a camera are a little lacking, but even allowing for that, it’s not great. All in all, not impressed. It may warn on the packaging that there are no guarantees with dark fabric, but if that’s the case, don’t use it in your video promo, Derivan.

In no way could I give this to a kid and have them think it was a real Anna dress. I’d already written off my chances of doing the design on the skirt. But now I’m really back to the drawing board. I have no skill with a paint brush, and no desire to spend the $12-15 per colour that would let me test them, since there’s every chance that this would also fail. And I don’t really want to give up the time to embroider them all – that’s a whole lot of time to invest in a kids costume. So I’m back at the drawing board and researching alternatives. If anybody has any ideas, short of buying a sewing machine that will embroider, I’d love to hear from you!

Pink! And Historical! And…

Well, everything, really. See, after a hiatus of posting – because writing essays has been more than enough time at the computer for the past few months – I’ve decided to see how many Historical Sew Fortnightly tasks I can tick off with just the one item.

I’m sewing like a mad thing at the moment, trying to get together items for a market stall in a bit less than a month. Items of children’s costume, since I’ve decided that I love sewing for kids. You can do the most over the top, outlandish things, and kids will love it. So, with that in mind, before the big reveal, let me tease a little and tick off a few challenges, however late I’m completing them.

1. Challenge #6 – Fairytale.

256px-Anna_Render

In 1844, the Hans Christian Andersen fairytale, The Snow Queen was first published. Earlier this year, a film was released with Disney’s take on the tale. Frozen has since become the favourite movie of every little girl on the planet – or at least it seems that way to anyone who wanders through a kindergarten and hears the spectacular versions of the hit song, Let It Go. I’ve had previous run-ins with Queen Elsa costuming, and with the frantic mothers who have been desperately trying to find a costume for their birthday girl. But this time, I’m attempting Princess Anna instead.

2. Challenge #3 – Pink

Not sure if you’ve noticed, but Anna’s cloak is pink. Or at least magenta. I’m choosing to interpret this as pink. Which leads me to…

3. Challenge #2 – Innovation

Early fabric dyes were created using natural substances. There was a limited range of colours available, and many tended to fade. Science accidentally delivered an alternative when William Henry Perkins was attempting to synthesise quinine, but instead created mauveine, a synthetic dye. This was closely followed by Fuchsine in 1858 or 1859 (sources vary on the date), discovered by Frenchman Francois-Emmanuel Verguin, and, in 1860, Magenta, discovered by Brits Chambers Nicolson and Georges Maule. The colours were a great success, and many variations on the shades have been produced since. I’m using two of these in my cloak.


Bouguereau's Psyche, 1892, using magenta for the goddess's cloak.

Bouguereau’s Psyche, 1892, using magenta for the goddess’s cloak.

4. Challenge #10 – Art.

Okay, I know this one’s a stretch, but technically, the creators of the Disney movies are artists. These days they’re digital artists, but the skills are still the same. And given that I’m working off a single image, I figure this will fit. Give me some leeway, here, folks!

And finally…

5. Challenge #15 – The Great Outdoors.

This one is less of a stretch. I’m making a cloak – it’s made for wearing in the great outdoors. And anyone who’s seen the movie knows that Anna acquires the cloak in order to survive the blast of icy weather triggered by her Snow-Queen-sister, Elsa, as she treks to an ice palace to try and talk her down.


Wow, 5 challenges in one – better than I thought. So now I’ve covered that off, how am I making a Disney costume that is also historical? Well, keep reading and you’ll find out!

I know the inspiration image is a cloak, with a cape over the top. I’m simplifying things and just making the cape. The design for this is drawn from a pinterest page that shows a pattern book from what looks to me like the early 1940s. Again, I’m choosing to interpret it that way so that it fits the challenge!

ed847e453f0ef3650867378abc2b3f55

Not being blessed with the ability to read Spanish, I’ve had to guess on a few things and just take the image as my inspiration. But I managed. So, for the great unveiling of the finished product…

DSCN6671

DSCN6672

DSCN6673

The Challenge: I don’t really need to list them all again, do I?

Fabric: About 70cm of velveteen, and about 50cm of satin lining.

Pattern: My own, but based on the Spanish pattern book above.

Year: 1940-ish

Notions: polyester thread, 1m of satin ribbon

How historically accurate is it?: Reasonably accurate. I left the darts out of the original pattern and played with the length, but on the whole it’s pretty close. The fabrics are synthetic versions of things that were available at the time.

Hours to complete: Including drafting the pattern, and faffing about figuring the best way to iron velveteen (Answer? Dont! Use steam instead!), it probably took about 4 hours total.

First worn: Never worn – but going to be for sale on Etsy, and at the Essendon North Kindergarten Fete, so some time after the first sale!

Total cost: The fabrics were all bought wholesale, so providing a price to make is a little inaccurate based on what I would pay buying retail. I can say that I’m selling them for AU$30 though!